Making a dumb stereo amplifier smart with Home Assistant & ESPHome
Wherever possible, I try to live my life by “Buy well, buy once”. Admittedly this is often at odds with technology, where we are encouraged to continue replacing perfectly functioning devices for one or two new features each year. As such, when I decided to treat myself to a nice pair of speakers a few years ago, I wanted to surround them with equipment that would stand the test of time. As much as I love the concept of Future-Fi, I prefer the idea that when my music streamer no longer supports the latest service, I can simply replace that individual component, as opposed to chucking out a fully working amplifier.
I ended up choosing a Cambridge Audio CXA60 - enough features, great sound, good value. An inbuilt DAC allows me to connect my TV and Raspberry Pi-based music streamer with ease, and enough analogue inputs for my turntable and anything else I could wish to add in the future.
The only downside with my selection methodology (don’t become quickly outmoded), is a lack of “smart” (networked) features. Most importantly, it can only be controlled via IR remote or the controls on the unit itself, no IP or HDMI-CEC based controls as seen on hardware more commonly destined for TV use (i.e. soundbars).
Why is this a problem? I am aware it’s not a hardship to use two remotes, but where’s the fun in that? I’ve been using Home Assistant on and off for several years now, and I get great satisfaction from controlling the real-world via software. In sum, I want my dumb amplifier to power on and off with my TV. I’m happy to use the amp’s remote to control volume as I plan to add an Apple TV at some point, whose remote contains an IR blaster which I will use for volume control.
Hardware

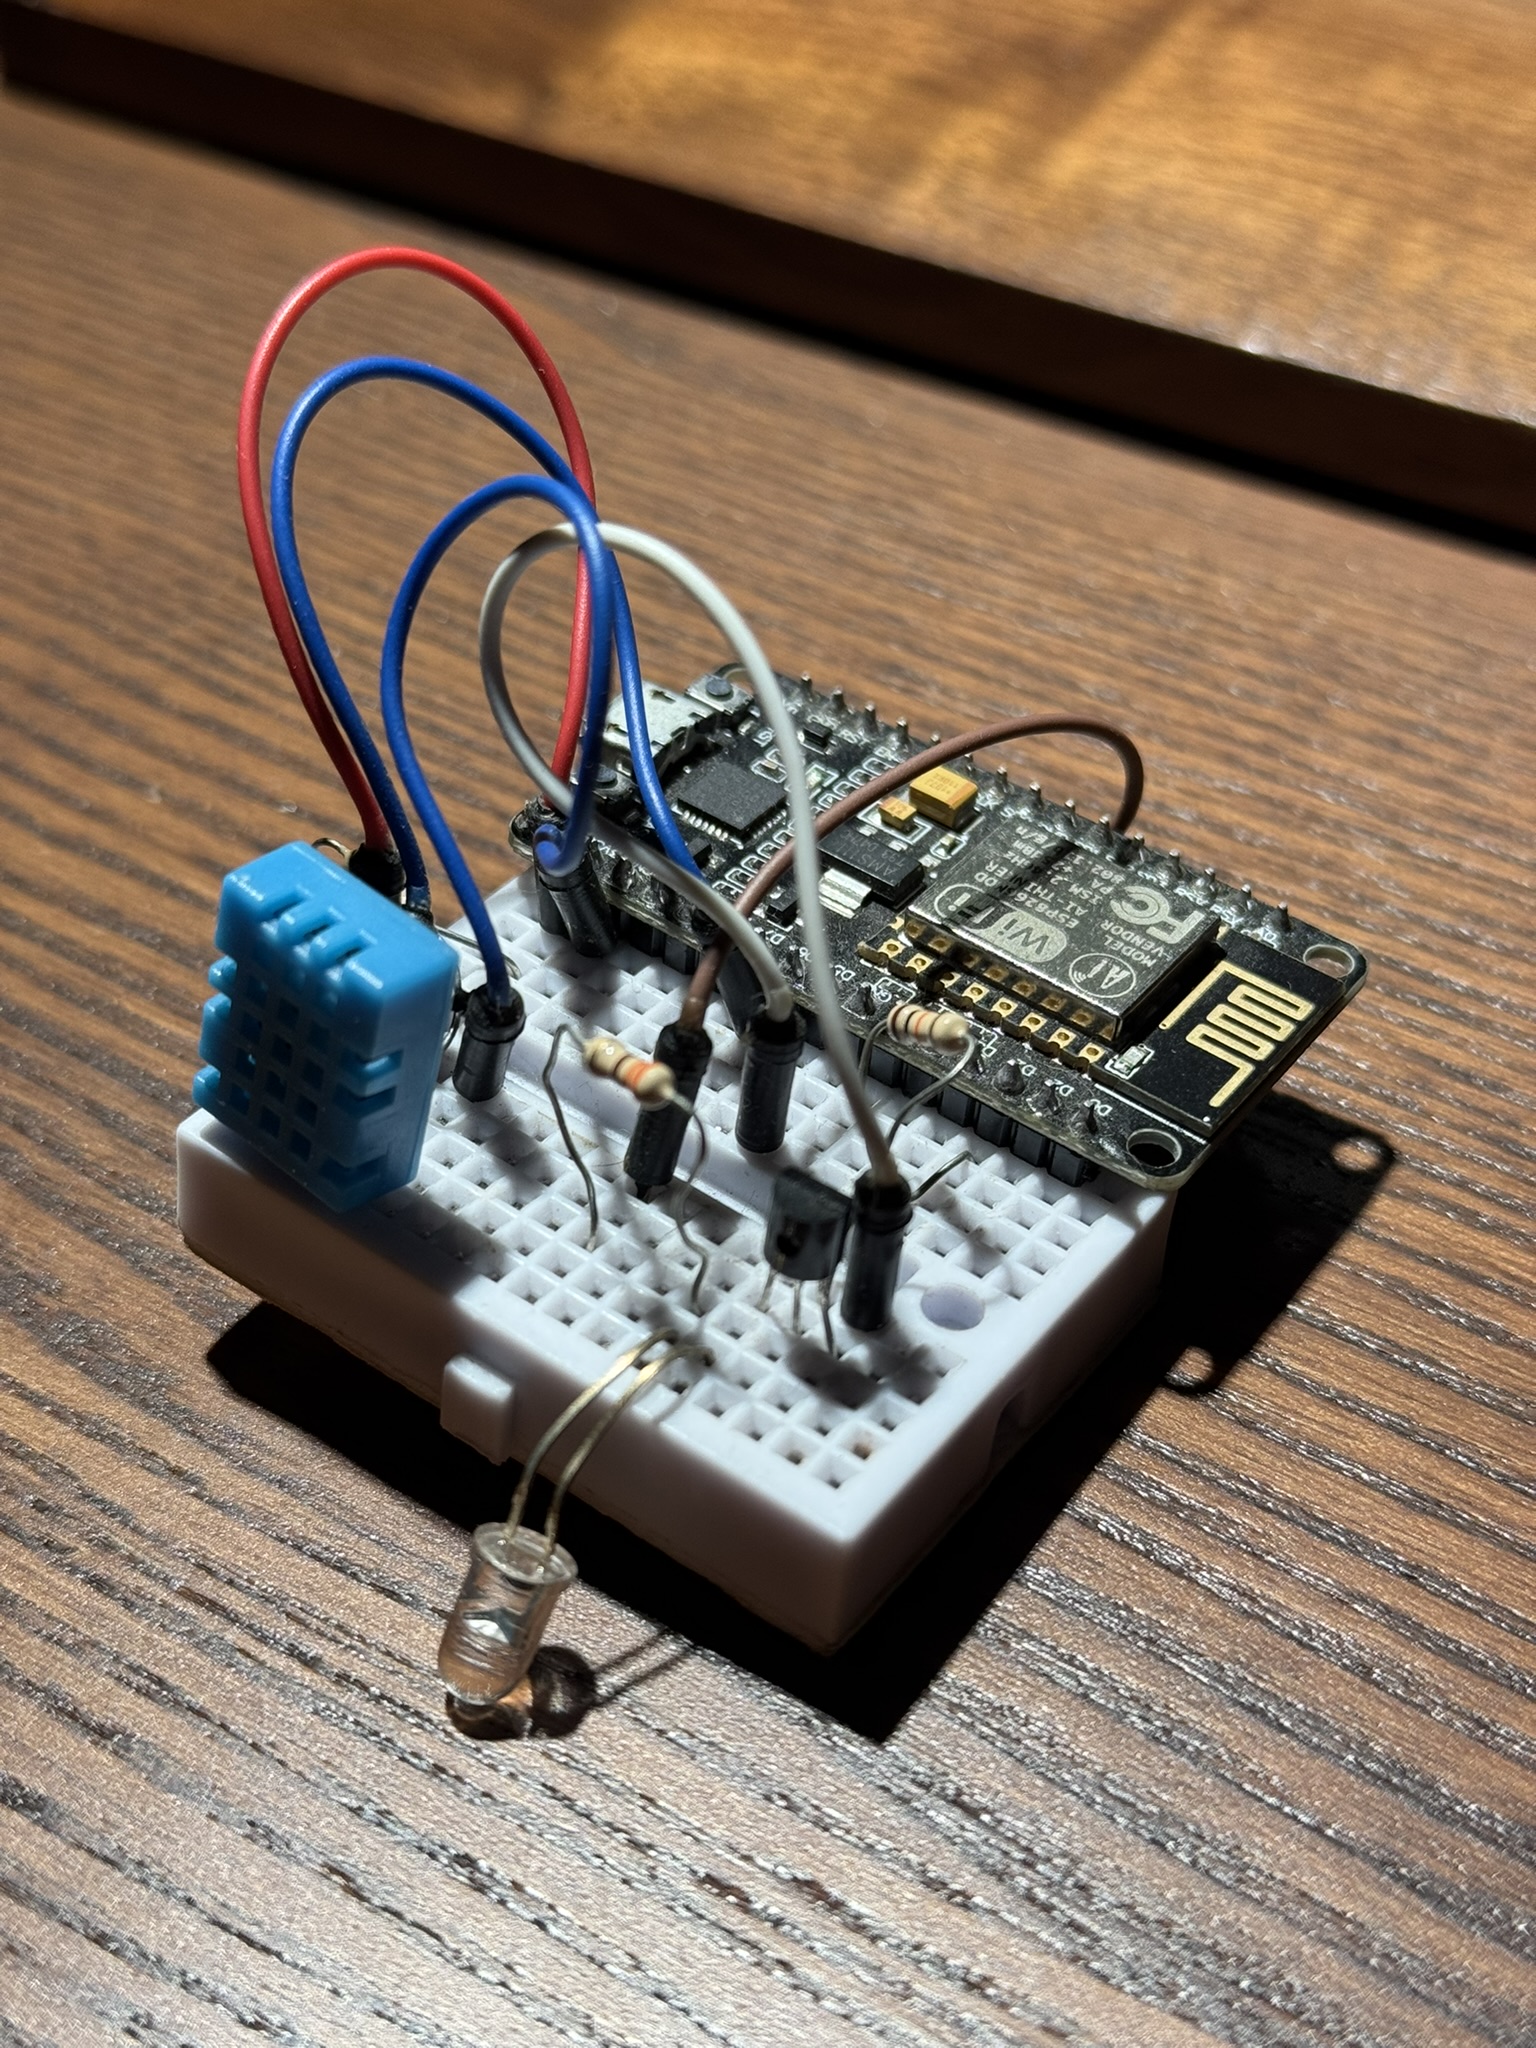
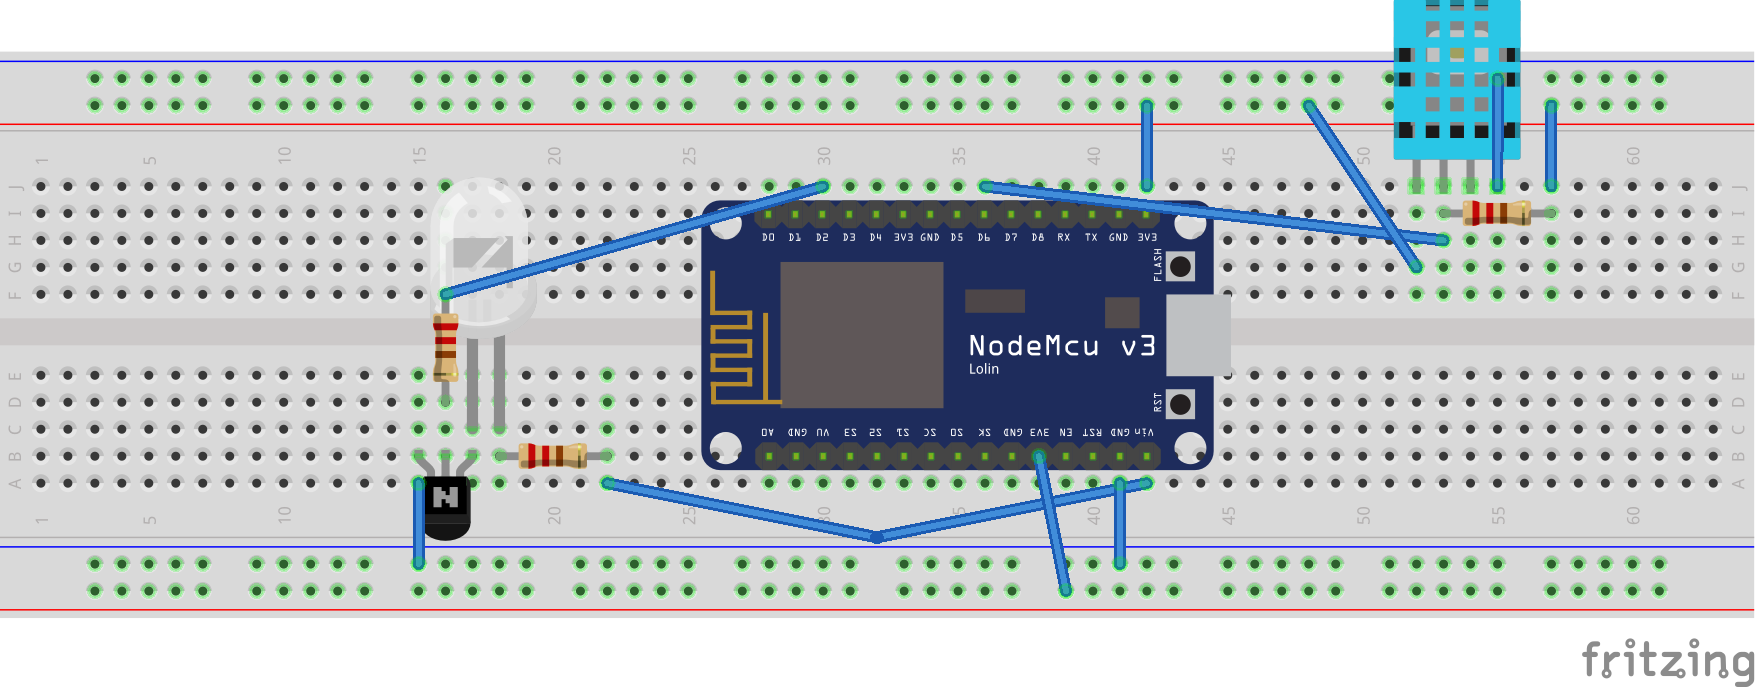
While ESP32s are all the rage in 2024, I still have a bunch of ESP8266 lying around, which are more than powerful enough to blast some IR signals. A simple IR LED (behind a transistor for enough power) is all we need to control the amplifier, but I added a DHT11 to monitor the temperature inside my TV cabinet.
ESPHome Config
In the past, I’ve written my own Arduino-style C++ code to run on ESP8266s (see esp8266_433mhz_transmitter), but the fantastic ESPHome project provides us a much simpler alternative. Think of it as a declarative language for microcontrollers. You specify what you want the device to do, and how the various components are connected to your microcontroller, and esphome does the rest. You can see the full config for my IR Transmitter here: ir_transmitter.yaml, but let’s go through it in more detail here:
We start by naming the device and specifying the type of microcontroller:
esphome:
  name: ir_transmitter
  platform: ESP8266
  board: nodemcuv2
The remainder of the “boilerplate” is providing wifi credentials and some other config options (see the documentation for what these do exactly)
wifi:
  ssid: !secret wifi_ssid
  password: !secret wifi_pass

  # Enable fallback hotspot (captive portal) in case wifi connection fails
  ap:
    ssid: "IR Transmitter Fallback Hotspot"
    password: !secret ap_pass

captive_portal:

# Enable logging
logger:

# Enable Home Assistant API
api:
  password: !secret ha_pass
Now we get into the good stuff, working with the (admittedly not particularly accurate or precise) DHT11 temp sensor, is as simple as an 8 line declaration ⬇️ This gives us 2 entities in Home Assistant that update every 60 seconds.
sensor:
  - platform: dht
    model: DHT11
    pin: D6
    temperature:
      name: "TV Unit Temperature"
    humidity:
      name: "TV Unit Humidity"
    update_interval: 60s
To avoid much repetition, let’s look at the declaration for one remote button ⬇️ After defining the transmitter itself, we define each button from the remote as a “switch” that we can operate via Home Assistant (or the ESPHome web interface for each device). Thankfully some Googling about Cambridge Audio equipment revealed that they use the RC5 IR protocol, and they had published a list of the address/command combos they use, which saved me having to manually record each button. You can see the full list of switches in the github repo.
remote_transmitter:
  pin: D2
  carrier_duty_percent: 50%

# Individual switches
switch:
  - platform: template
    name: "Power Off"
    turn_on_action:
      remote_transmitter.transmit_rc5:
        address: 16
        command: 15
        repeat:
          times: 3
          wait_time: 0.5s
...
For reference, here’s how the whole thing is wired up:

ESPHome Installation
There are a few ways to install ESPHome and push a project onto your microcontroller, with the top 2 being: via Home Assistant, or via a CLI tool. I personally like the CLI tool for easier version control of my config files (and because I live in the terminal anyway).
After following the instructions to install the tool and plugging in your ESP8266 via USB, it’s as simple as esphome run ir_transmitter.yaml. This will build the project and install it to the device you select during the installation process. Once complete, the terminal will show the device’s log output while it remains connected to your machine.
I would recommend at this point, visiting the device at http://hostname.local in your browser to check everything is functioning as intended.
Home Assistant Integration
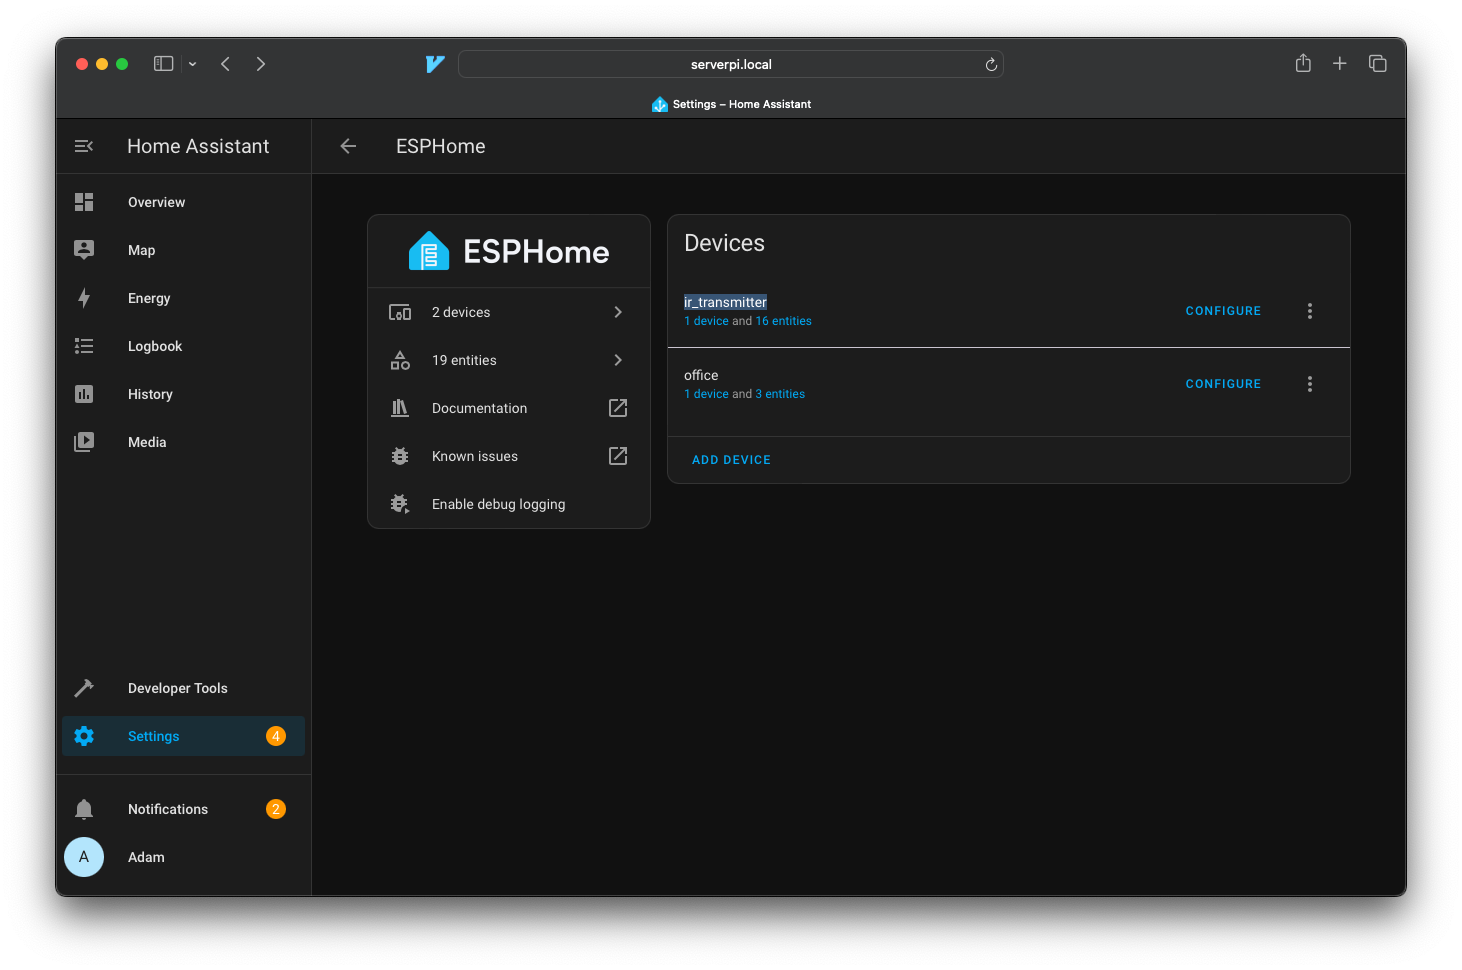
Once the device is on the network, navigate to your Home Assistant instance. Under “Settings”, there should be a prompt for you newly created device. One you add it, it should be visible in the ESPHome integration page:

Home Assistant Automations
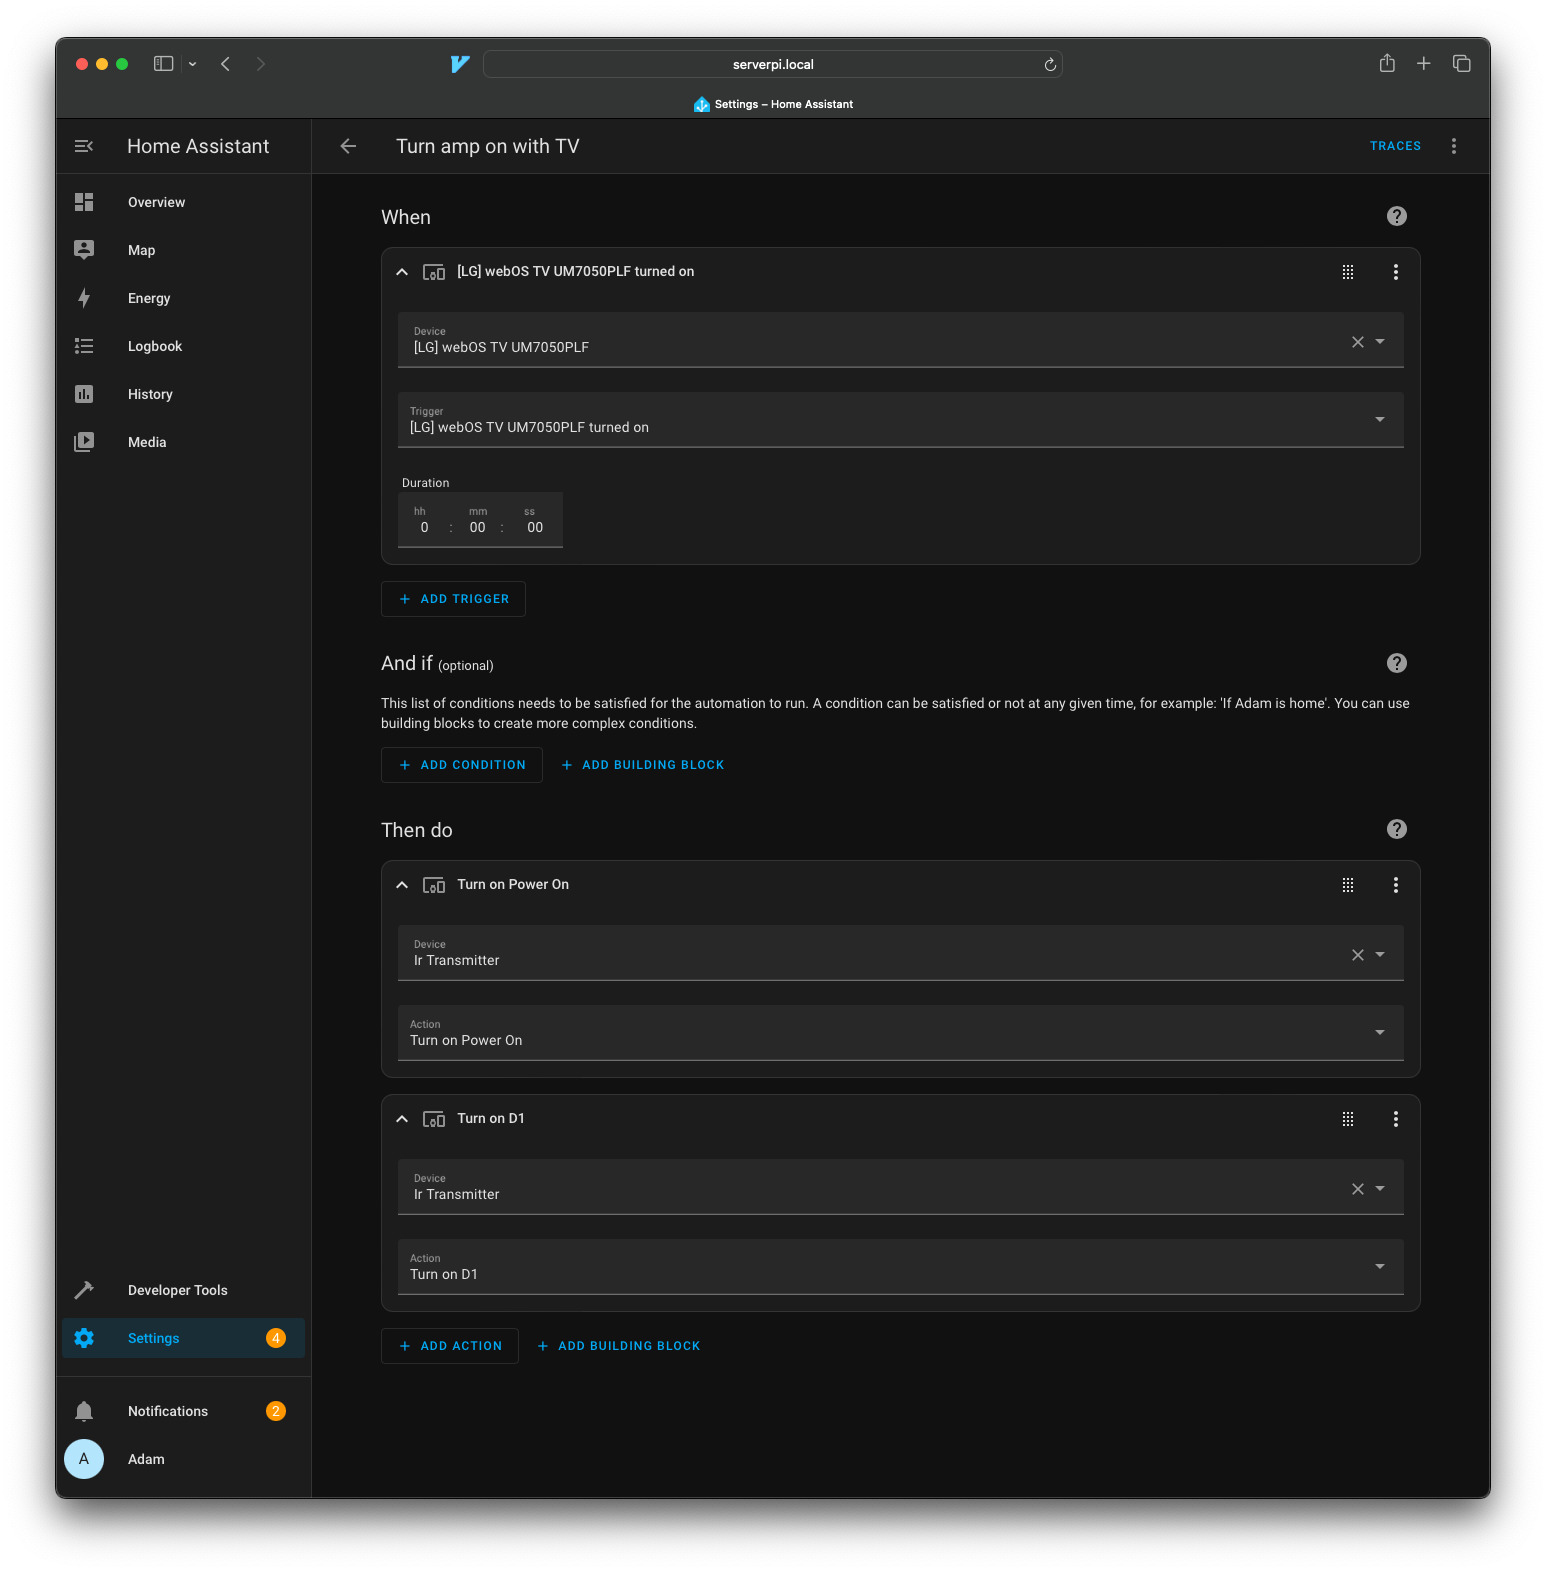
Now the fun part! For my usecase, I first need to know the powered on/off state of my TV. Thankfully there’s a nice integration for my LG WebOS TV.
Which allows me to write this very complicated (/s) automation ⬇️

And voila! After duplicating that automation for the Power Off case, we have a much smarter amplifier!
Previous Experiments
I have previously tried to add an IR Receiver to this setup, such that I can keep my media cabinet closed. This worked by receiving the Volume Up/Down commands from the LG TV remote, and then sending the amplifier’s volume commands instead. This worked ok, but the cheap IR sensor I was using didn’t have a 100% detection rate, so you’d often be spamming the button to get it to change. I also didn’t like running the hot amplifier inside the closed cabinet. I’m hoping the Apple TV remote will solve this problem for me.
Future Work
Some plans for the future:
- 3D printed casing
- Auto switch the input between TV/streamer/turntable
- Auto-power on for the streamer (easy) and turntable (harder) inputs
- Auto open the media cabinet door, for cooling and IR transmission